

Follow these steps to set up an email account in MAC Mail:
1. Open the MAC Mail application.
To do this, open the Mail application. You can access Mail via the launch pad or under Applications in Finder.

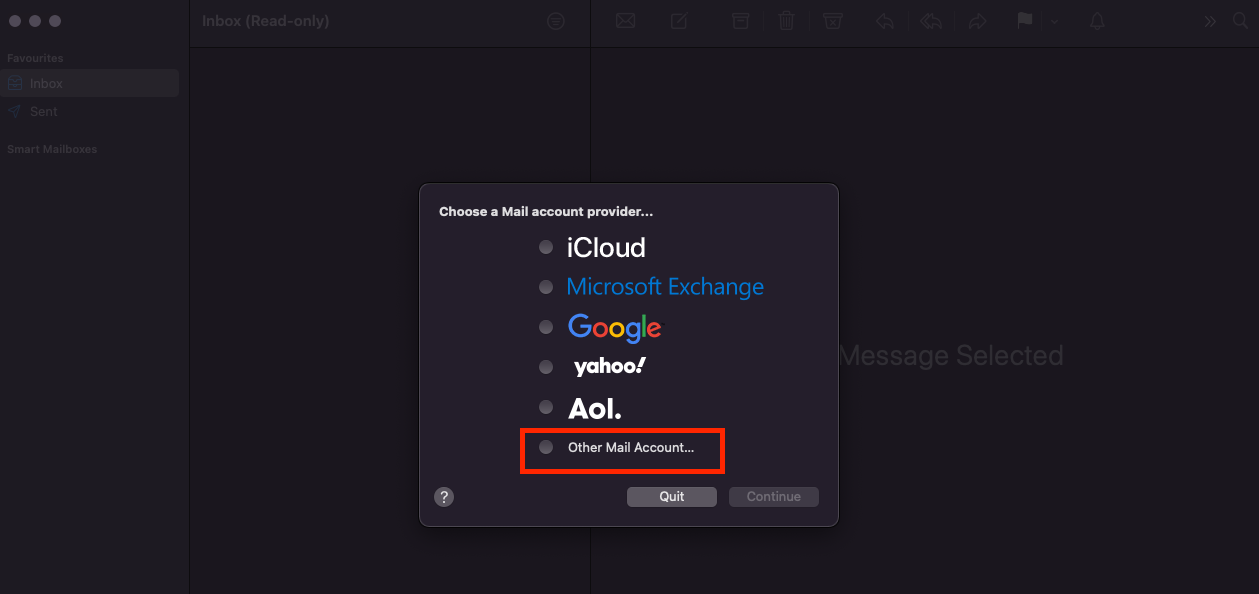
2. Once Mail has opened, select Other Mail Account, then click the Continue button.
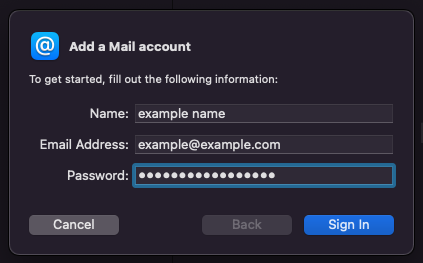
3. Enter your email address and password. Once completed, click the Sign In button.
4. You must fill in your incoming and outgoing server settings for Mac Mail.
Note: Please refer to your Hosting Account Information email for these details.
Once completed, click the Sign In button. Your emails will start populating.
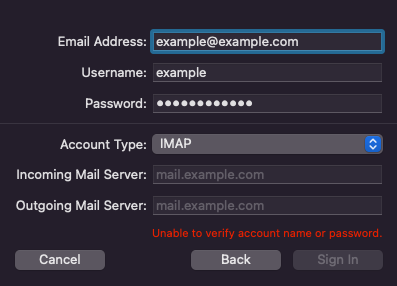
If you receive an error whilst trying to connect to the server, try:
- Verifying your credentials are correct by logging into your email via webmail. (You can log in to your webmail by using this link: https://mail.hosting-cloud.net)
- Double-check the incoming and outgoing server settings entered into MAC Mail.