

Creating custom nameservers as a reseller can be a lucrative business. With the right tools and knowledge, you can set up your own DNS servers and earn money by providing these services to your clients.
By creating custom nameservers, you can help your customers feel more secure using your brand and set yourself apart from the competition.
Click here for cPanel instructions.
Click here for DirectAdmin instructions.
Follow these steps to create custom nameservers in cPanel:
1. Log in to your cPanel account for the domain where you wish to create the custom nameservers.
For instructions on how to log in to cPanel, please click here.
2. Once logged in, under the Domains section, click Zone Editor.

3. Click the Manage button for the domain you want to make custom nameservers for.

4. Add the corresponding ‘A’ records into your zone editor. (Replace ‘yourdomain.com’ with your domain name.)
ns1.yourdomain.com → 103.146.112.25
ns2.yourdomain.com → 45.125.247.205
ns3.yourdomain.com → 180.149.231.51
ns4.yourdomain.com → 45.252.189.5
For example, if your domain is ‘example.com’, then your custom nameservers would look like this:
ns1.example.com → 103.146.112.25
ns2.example.com → 45.125.247.205
ns3.example.com → 180.149.231.51
ns4.example.com → 45.252.189.5
To add these records, click the + Add Record button on the right-hand side of the page.

5. A form will appear for you to fill in. See the example below:

6. Click the Save Record button once you have entered the names/records.
Once these records have propagated, other domains can use them as their primary nameservers.
Follow these steps to create custom nameservers in DirectAdmin:
1. Log in to your DirectAdmin account for the domain where you wish to create the custom nameservers.
For instructions on how to log in to DirectAdmin, please click here.
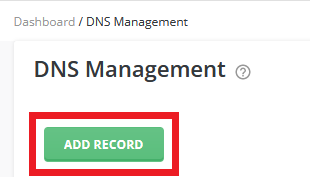
2. Once logged in, under the Account Manager section, click DNS Management.

3. Click the Add Record button.
4. A window will pop up, allowing you to fill out a form to add the new DNS record.
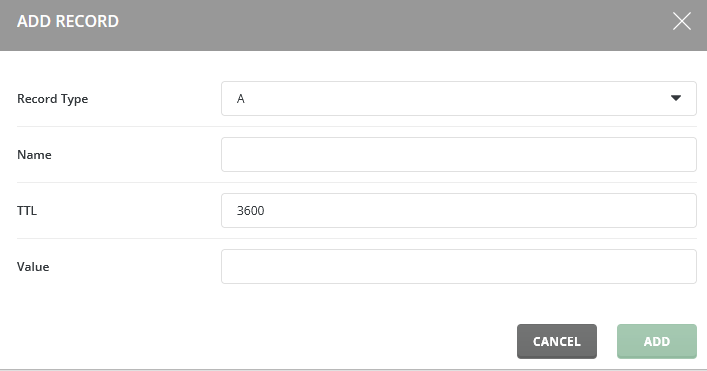
4. Add the following ‘A’ records into your zone editor. (Replace ‘yourdomain.com’ with your domain name.)
ns1.yourdomain.com → 103.146.112.25
ns2.yourdomain.com → 45.125.247.205
ns3.yourdomain.com → 180.149.231.51
ns4.yourdomain.com → 45.252.189.5
For example, if your domain is ‘example.com’, then your custom nameservers would look like this:
ns1.example.com → 103.146.112.25
ns2.example.com → 45.125.247.205
ns3.example.com → 180.149.231.51
ns4.example.com → 45.252.189.5
To add these records, complete the form, then click the ADD button.
Once these records have propagated, other domains can use them as their primary nameservers.
Note: In DirectAdmin, don’t forget to add the full stop ‘.’ at the end of the record name, as this signifies the end of the record. It is common practice; however, some control panels automatically add the full stop ‘.’.
In this example, notice the full stop at the end of ‘ns1.example.com.’.
If you don’t add a full stop, it will append the domain name to the end of the record. Without a full stop, ‘ns1.example.com’ becomes ‘ns1.example.com.example.com’.